Pages

Wednesday 21 August 2013

Natural Dip Dye

During my art foundation course I did some research into natural dyes and ended up using it as a process in my final project. It is a process that has stayed with me and I hope in the future to grow my own plants to use as natural dye stuffs but in the mean time I use what I can easily get my hands on.

I've been planning this project for a while now but just never seem to get around to it, but today I had good enough weather to hang stuff in the garden so I got my saucepans out!


To dye this simple shirt I used powdered turmeric as it creates such a bright vivid yellow that is perfect for summer. Turmeric is a great natural dye to get hold of as it is a common spice that is already powdered which makes the dying process much quicker and simpler too. I boiled half a pan of water with about two tablespoons of turmeric powder in until it had mostly dissolved. I hung the shirt over the pan so I could dip dye the end rather than dye the whole thing.


The deep orange colour is difficult to achieve from Turmeric once dried, the top has turned much more yellow than orange after it had dried during the afternoon but I might dye it again in the future to try and get a deeper yellow/orange than bright yellow.


The great thing about using natural dyes is that the colours do change over time, exposure to the sun, wear and washing will change the colours but it just means I can re-dye it later on to create another new looking top without having to actually buy one!


I love it! I love it even more because it took about 20 minutes to dye then all I had to do was wait for it to dry!

Friday 2 August 2013

Summer Fruits

Summer holidays mean fruit picking and this year our local PYO is looking pretty good. All that sunshine we've been having and the soggy year last year seems to have provided a pretty good crop so far!

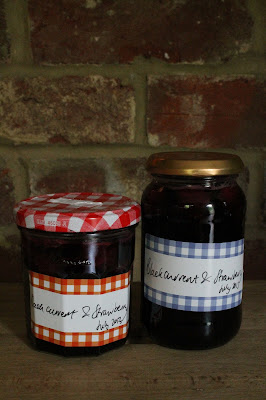
I spent a lovely hour in the late afternoon sunshine picking blackcurrants and strawberries to bring home for some summer jam making.


I picked a kilogram of each and once I'd got them home I washed them and took out all of the stems (I'll be honest I didn't pick all of the bits off the blackcurrants because I'm lazy and... someone told me it would simply add to the rustic taste....great advice!).


To make jam you need the same weight of fruit to preserving sugar and knowing I had 2kg of fruit I knew I'd need 2kg of sugar... However, when I came to weigh the fruit, just for the purposes of double checking, I didn't quite have enough... I've since heard this is a common mystery that occurs when living with other people, food just disappears....


The first step is to soften the fruit over a low heat in 125ml of lemon juice (if you're using 2kg of fruit/sugar). Once the fruit is soft and the amount of juice has more than doubled in the pan you can add the sugar. Keep stirring until all of the sugar has dissolved. Once it has, you can bring the fruit to the boil for around 15 - 20 minutes then test it to see whether it has set. If you don't have a jam thermometer there are a few other ways to test for the setting point. I recommend trying both the first time then in future you can use the one that worked the best for you. Here is a good video demonstration of the saucer test. The other method is the flake test.


I did these tests and thought my jam was set but once it had time to cool in the jar it was still a little runny. BUT TASTES AMAZING!


Jam making was actually much easier than I thought and I'm definitely going to do it again. It is so satisfying making something for yourself that you can then enjoy throughout the year (my batch made about 9 jars!) and I'm certain it tastes better than bought jam just because I made it myself!